Side Dishes
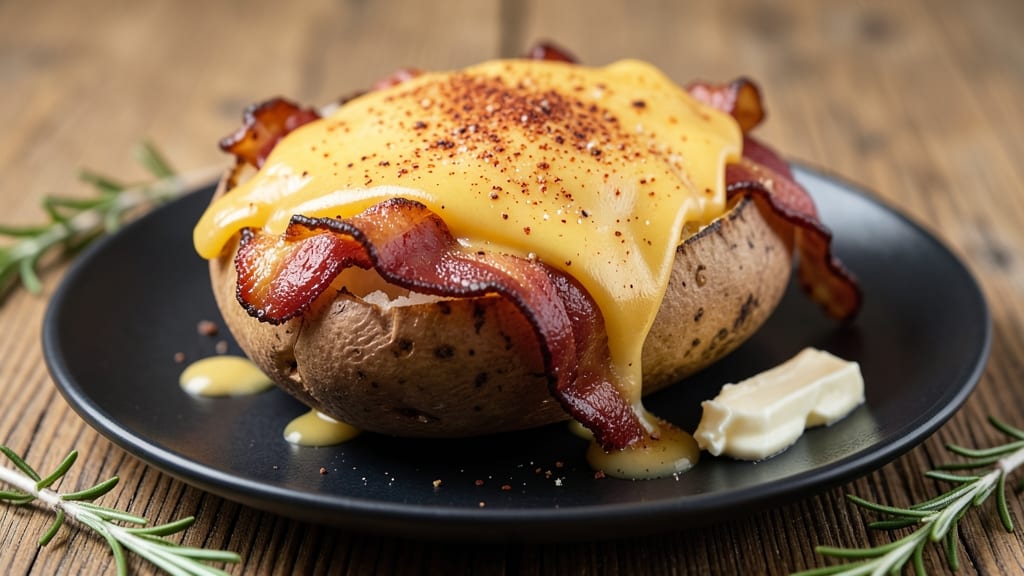
This baked potato skins recipe with cheese and bacon delivers the ultimate crispy, cheesy, bacon-loaded appetizer that’s impossible to resist. 🔥 The secret to success lies in perfectly boiled potatoes, a golden-brown oven bake, and the perfect balance of salty bacon, melty cheese, and crispy edges—every bite is a flavor explosion.
Whether you're feeding a crowd or craving a satisfying snack, this recipe transforms humble potatoes into a showstopping dish.
Start with russet potatoes for their fluffy texture and crispy skin, then boil them until tender before hollowing and topping with crispy bacon, sharp cheddar, and a sprinkle of seasoning.
The high-heat bake ensures a crispy top that holds up to every cheesy, crunchy bite, while the inside stays tender and creamy. This isn’t just a side dish—it’s a main event that disappears faster than you can say "second helping."
What makes this recipe truly special is the versatility. Swap cheddar for Monterey Jack or pepper jack for a smoky kick, or stuff the skins with pulled pork, chili, or even mac and cheese for a heartier twist.
Serve with sour cream, chives, or a dollop of Greek yogurt for extra creaminess. The possibilities are endless, but the crispy, cheesy, bacon-packed foundation is always foolproof.
Ready in just 45 minutes, this dish is perfect for game day, potlucks, or a cozy night in. The aroma alone will have everyone gathering around the table, and the first bite guarantees it’ll become a regular in your rotation.
Let’s make these crispy, cheesy, bacon-loaded skins that taste like comfort food at its best.
Ingredients for baked potato skins with cheese and bacon
Crispy skins, melty cheese, and crunchy bacon—just 11 ingredients for crowd-pleasing perfection.
| Ingredient | Amount | Notes |
|---|---|---|
| Russet Potatoes 🥔 | 6 whole | Large, unpeeled for skins |
| Thick-Cut Bacon 🥓 | 12 oz | Crispy, chopped into bits |
| Sharp Cheddar Cheese 🧀 | 2 cups | Shredded, block preferred |
| Butter 🧈 | ½ cup | Melted, unsalted preferred |
| Garlic Powder 🧄 | 1 tsp | Freshly ground for flavor |
| Paprika 🌶️ | 1 tbsp | Smoked for extra depth |
| Salt 🧂 | 1 ½ tsp | Kosher or sea salt |
| Black Pepper 🌶️ | ½ tsp | Freshly cracked |
| Sour Cream 🥛 | ½ cup | For serving, optional |
| Chives 🌿 | 2 tbsp | Chopped, for garnish |
| Olive Oil 🫒 | 2 tbsp | For greasing skins |
Russets are non-negotiable here—their thick skins crisp up beautifully while staying fluffy inside. Buy organic if possible—they’re easier to scrub and have fewer blemishes. For the bacon, thick-cut from Costco or Trader Joe's gives the best crunch, but regular grocery store bacon works too. The cheddar? Block is a must—pre-shredded gets gummy. I always grab extra because once you start shredding, you’ll want to use it all. The butter should be unsalted so you control the seasoning.
No thick-cut bacon? Regular bacon cut into smaller pieces works, but it’ll be less crispy. Swap cheddar for Monterey Jack or pepper jack if you want something milder or smokier. Short on chives? Green onions or parsley are great substitutes. The olive oil is just for greasing—use whatever’s in your pantry. If you’re feeling fancy, add a sprinkle of crumbled blue cheese or crispy fried onions on top before baking for extra texture. And trust me, the extra 5 minutes to crisp the bacon in a skillet before baking makes all the difference.
Boiled potatoes keep in the fridge for 2 days if you prep ahead—just store them in cold water to prevent browning. The bacon bits? Freeze extras for 3 months—they’re perfect for salads or tacos later. Once baked, these skins reheat beautifully in the oven at 350°F for 10 minutes. I always make a double batch—one for the table, one for leftovers. Serve with extra sour cream and chives on the side so everyone can customize their bites.
Why You'll Love This Recipe
- One-Pan Magic: I swear by this—just slice, bake, and let the oven do the work. No boiling, no peeling, no extra dishes. The bacon renders right on the sheet pan while the potatoes crisp up perfectly.
- Crispy-Creamy Bliss: That first bite? Crunchy skin, gooey cheddar, and smoky bacon—it’s like a hug in food form. The garlic powder ties everything together in a way that makes me reach for seconds without thinking.
- Game for Any Gathering: Bring these to a picnic, a game day, or just a lazy Sunday. They’re hearty enough for a main but easy enough to toss in a lunchbox. My college-aged son still begs for them when I make them.
- Budget-Friendly Feast: Russets and bacon stretch far, and sharp chedddar adds richness without breaking the bank. Leftovers? Even better cold the next day—just reheat and enjoy. Honestly, it’s my go-to for feeding a crowd without stress.
Step-by-step instructions for crispy baked potato skins
Here's how to make the ultimate cheesy, bacon-topped potato skins with a perfect crispy crust.
🔥 Step 1: Prep and Bake the Potatoes
Preheat your oven to 425°F and line two baking sheets with parchment paper. Pierce each of the 6 whole Russet Potatoes all over with a fork—this helps steam escape and prevents bursting. Place them on the baking sheets and bake for 45-50 minutes until completely tender when pierced with a knife. You're looking for potatoes that feel soft all the way through.
Here's the thing—don't skip the piercing. I've learned the hard way that skipping this step leads to exploded potatoes in the oven. Also, turn them halfway through baking for even cooking. Once they're done, let them cool for 10 minutes before handling—they'll be scalding hot!
🍳 Step 2: Create the Cheesy Bacon Topping
While the potatoes bake, cook the 12 oz Thick-Cut Bacon in a large skillet over medium heat until crispy. Drain on paper towels, reserving 2 tablespoons of the bacon fat in the pan. Chop the bacon into ¼-inch bits—you want those crunchy little pieces for maximum flavor.
In a mixing bowl, combine the 2 cups Sharp Cheddar Cheese, 0.5 cup melted Butter, 1 tsp Garlic Powder, 1 tbsp Paprika, 1.5 tsp Salt, and 0.5 tsp Black Pepper. Stir until the cheese is fully melted and the mixture is smooth. This is your flavor bomb—don't skip the paprika for that extra smoky depth!
🥘 Step 3: Prepare the Potato Skins
Carefully slice each potato in half lengthwise and scoop out the flesh, leaving a ¼-inch thick shell. I use a spoon to scrape out the insides—leave the skins intact for that perfect structure. Brush the inside of each skin with 2 tbsp Olive Oil and sprinkle lightly with salt to enhance the crispiness.
Here's where it gets fun—place each skin on a baking sheet and fill the center with about ¼ cup of the cheesy bacon mixture. Top with additional cheese mixture, then sprinkle with the chopped bacon. The key is to create a generous but even layer—you want that first bite to be packed with flavor.
🔥 Step 4: Bake to Golden Perfection
Return the stuffed potato skins to the oven and bake for 15-20 minutes until the tops are deep golden brown and bubbly. Watch closely during the last few minutes—you want that crispy crust, not burnt cheese. The skins should be crispy on top while still tender underneath.
I like to broil for the last 2 minutes to get that extra crispiness, but keep an eye on them—broilers can be aggressive! When they're done, let them rest for 3 minutes before serving. This resting time helps the cheese set and makes them easier to handle.
🍽️ Step 5: Serve with Sour Cream and Chives
Transfer the potato skins to serving plates and top with dollops of 0.5 cup Sour Cream and 2 tbsp chopped Chives. The contrast of cool, tangy sour cream against the hot, cheesy skins is what makes this dish sing. Serve immediately while everything is crispy and melty.
Each bite should deliver that perfect combination of crispy potato skin, melty cheddar, crunchy bacon, and creamy sour cream. And here's the best part—these skins are even better the next day when the flavors have had time to meld together. Enjoy your cheesy, bacon-loaded masterpiece!
Pro Tips For Making Baked Potato Skins With Cheese And Bacon
- Poke Holes in Potatoes: I learned this the hard way—skipping this step means soggy skins. Use a fork to poke 8-10 holes in each potato before baking; it lets steam escape so the flesh stays dry and crisp. (Yes, even if you’re impatient like me, resist the urge to skip this.)
- Bake Bacon First: Cold bacon on top of raw potatoes? Don’t. Cook the bacon until crispy, then drain on paper towels—all the grease. The extra fat renders out, giving your skins that rich, smoky flavor without making them greasy. (Your future self will thank you.)
- Pre-Bake Potatoes 20 Minutes: Start potatoes in a 425°F (220°C) oven for 20 minutes before adding toppings. This gets them halfway there without burning the cheese later. I used to rush this, and the skins would either stay doughy or the cheese would turn into a sad, greasy mess.
- Use Sharp Cheddar Crumbs: Skip the pre-shredded cheese—it’s coated with anti-caking agents that make it clump and weep. Instead, grate sharp cheddar yourself and sprinkle it lightly (about ½ cup per potato). The sharper the cheese, the more flavor; the less you use, the less it gets rubbery. (I know, I know, but trust the process.)
Storing and reheating this dish
Refrigerator Storage
Store leftover potato skins in an airtight container lined with parchment paper to prevent sticking. Keep them refrigerated for up to 3 days, but I recommend eating them within 2 days for the best texture. The crispy tops soften over time, but reheating restores that satisfying crunch. 🥔
Freezer Prep Tips
For longer storage, freeze unbaked skins in a single layer on a baking sheet before transferring to a freezer bag—this prevents clumping. Label with the date and freeze for up to 2 months.
Thaw overnight in the fridge before baking to maintain texture. I always double-wrap in foil for extra protection against freezer burn.
Oven Reheating
Preheat your oven to 375°F and place skins on a baking sheet. Cover loosely with foil to prevent over-browning, then reheat for 10-15 minutes until the cheese is melted and crispy again.
The key is medium heat—too hot and the cheese burns before the skins crisp. A sprinkle of water on the foil helps restore moisture if needed.
Air Fryer Option
For a quicker fix, use an air fryer at 350°F for 5-7 minutes, shaking halfway. This method works best for smaller batches and gives a slightly crispier texture than the oven.
Just watch closely—they reheat faster than you’d expect! I love this for single servings or when I’m short on time. 💫
Microwave Hack
If you’re in a rush, microwave skins covered with a damp paper towel for 1-2 minutes at 50% power. Add a splash of milk or water to prevent drying.
While not as crispy, this method works for a quick snack when you’re desperate. It’s not ideal, but sometimes we all need that cheesy fix fast!
Serving Leftovers
Revive reheated skins with fresh toppings like extra bacon bits or a drizzle of hot honey for a gourmet touch. Serve with a side of cool ranch dressing or spicy mayo for dipping.
The contrast of warm, cheesy skins with cool toppings is pure comfort food magic. Trust me, they’ll disappear just as fast as when they were fresh! 🔥
Nutrition facts
Frequently asked questions
Can I use sweet potatoes instead of russets for this recipe?
Sweet potatoes work but won't give you the same crispy texture. Their natural moisture makes them harder to crisp, and they have a sweeter flavor that doesn't pair as well with the salty bacon and sharp cheddar. If you're set on sweet potatoes, try baking them longer at 400°F and brushing the skins with olive oil before baking to help crisp them up.
How do I make these skins extra crispy?
The secret is in the prep! First, boil your potatoes for 5 minutes before baking to remove excess starch, then pat them completely dry. Brush the inside of the skins with olive oil after hollowing them, and bake at 425°F for the final topping step. For maximum crunch, broil for 1-2 minutes at the very end—just watch them like a hawk!
What's the best way to make these ahead of time?
Prep the skins up to the baking step and refrigerate them in an airtight container for up to 2 days. When ready to bake, add toppings and bake at 425°F for 15-20 minutes. For freezing, assemble the skins completely (with toppings) and freeze on a tray before transferring to a bag. Bake straight from frozen at 375°F for 25-30 minutes, covered loosely with foil.
Can I make these skins without bacon? Swap the bacon for crispy fried onions, crumbled sausage, or even chopped jalapeños for a vegetarian version. The key is maintaining that salty, crunchy element. If using sausage, cook it until crispy first to mimic bacon's texture. Just
Why did my skins turn out soggy instead of crispy?
Soggy skins usually mean one of two things: either the potatoes weren't dry enough or they didn't bake long enough.